

 Every blogger want, that people should share or linkback his work. So to get more links towords your blog you have to do so effort. Normally we us different different techniques to increase baklinks reputation and This widget is one of them. I am also using same widget on my blog as Sponsor us to let people to linkback our blog. This widget is made by combination of Badge image and Anchor link to your blog. So if also want to create it for you then follow below steps. It simple and you can easily able to create and use and if you want to learn other useful tutorial then don't forget to read about other widgets
Must Read:- Important Blogger Widgets And Plugins
Steps To Create Your own Blog Badge
- Firstly Open this link to create Blog Badge Visit Here
- Then Simple Add Your Text, Font Size, style and Color according to your choice
- After Making all chances then click on Create Logo Button
- Now Download it and Upload it on blogger or Picasa to get host your image.
Customization Steps For Badge
- After uploading your Badge Image Simple Copy its URL.
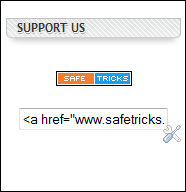
<center><div dir="ltr" style="text-align: center;" trbidi="on">
<a href="http://www.SafeTricks.com/"><img alt="Safe Tricks" src="IMAGE URL" title="Safe Tricks" /></a>
</div></center></br>
1. Replace http://www.safetricks.com/ With your Blog address
2. Replace IMAGE URL With your Image URL which copied above
3. Replace Safe Tricks With your Text which comes on Hover.
2. Replace IMAGE URL With your Image URL which copied above
3. Replace Safe Tricks With your Text which comes on Hover.
- After changing all things copy all the code.
Finalized Steps For Badge
- Open The HTML Encoder Here
- Then Paste below customized code in encoder and encode it.
<a href="http://www.SafeTricks.com/"><img alt="Safe Tricks" src="IMAGE URL" title="Safe Tricks" /></a>
- Above given codes are same anchor codes which we customize in Code No 1.
Code No 2
<center><input type="text" onclick="this.focusundefined);this.selectundefined)" readonly value="Encoded Code Here" /></center>
- Now Replace Encoded Code Here with it output encode codes
Steps To Add Badge
- Open Your Blogger Dashboard >> Layout
- Click on Add an Element >> Open Edit HTML/JavaScript box.
- Then Paste Code No 1 and just below it paste Code No 2 and click Save button.
- Finally your Badge button is Live on Your Blog


0 Comments